
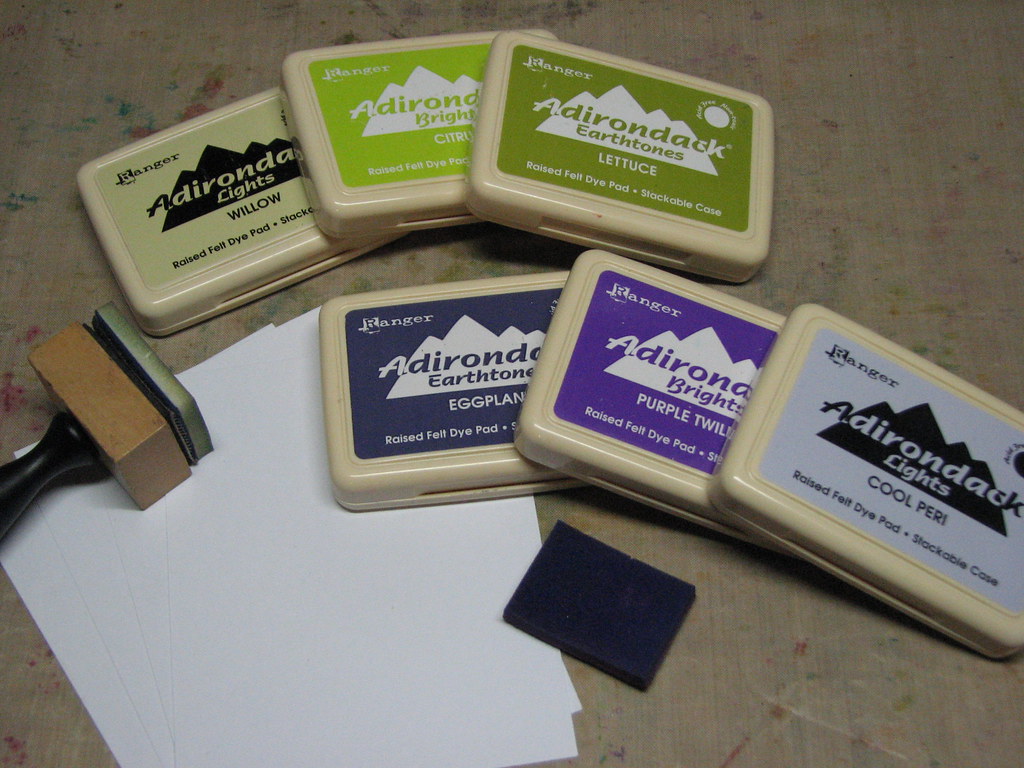
Supplies -
Ink Blending Tool & Foam - Ranger
Adirondack Archival Inks - Ranger
Non-Stick Craft Sheet - Ranger
Cardstock
That's it! That's all you need to get started on these great background techniques!!
Gradient Border Blending
Instructions:
*Note - for this technique you need 3 coordinating ink colors. The Adirondack Inks are perfect for this as they are grouped in color families each containing a Light, Bright & Earthtone shade. Ranger even has a handy color chart available to quick & easy reference.
 1. Place a torn piece of scrap paper over your cardstock approx. 1 1/2" - 2" from the edge.
 Note - you don't just have to use a torn edge, you can use die cut borders, a piece of deco edged paper, etc. Also you can adjust how far from the edge depending on how wide you want your finished border to be. Remember - You will start out at the widest point.
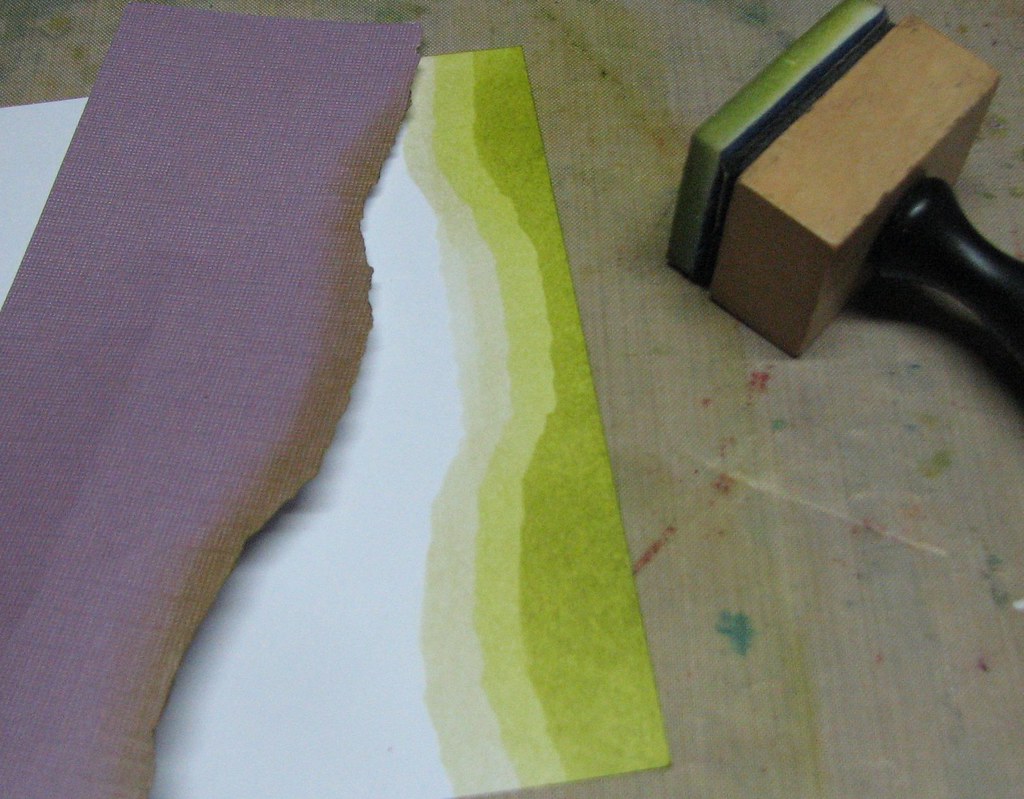
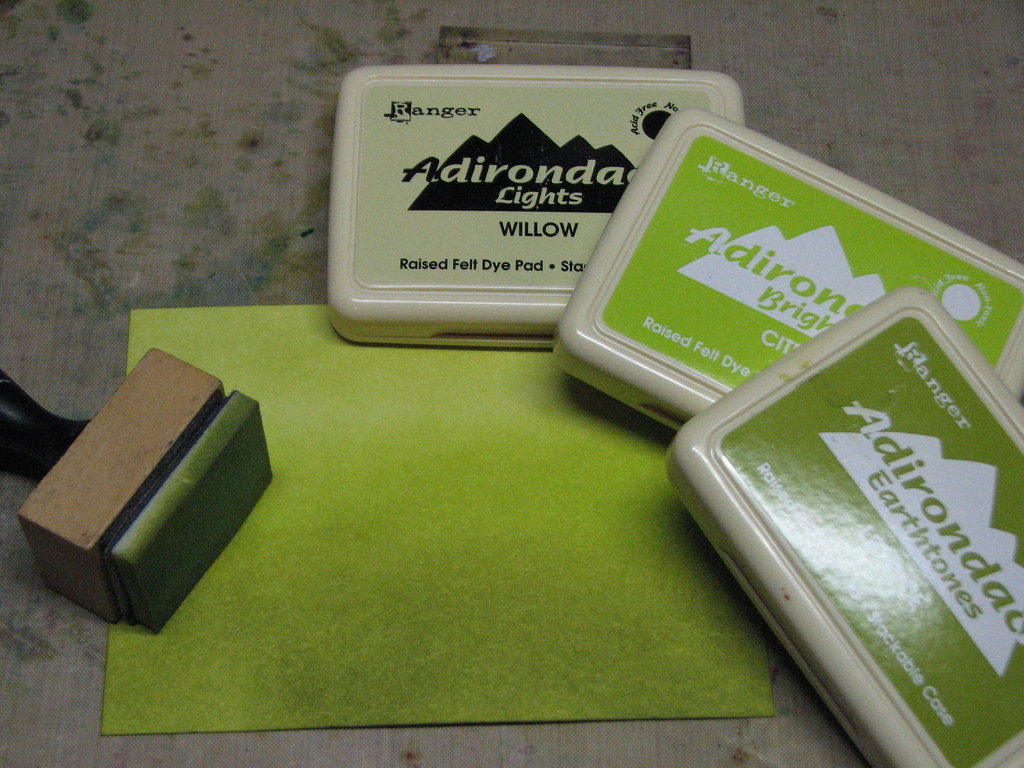
2. Pick up ink on your Ink Blending Foam from the lightest color and ink the entire exposed area. (Adirondack Dye Ink - Willow) Remember to start off the edge of your paper and work in circular motions for a flawless color finish.
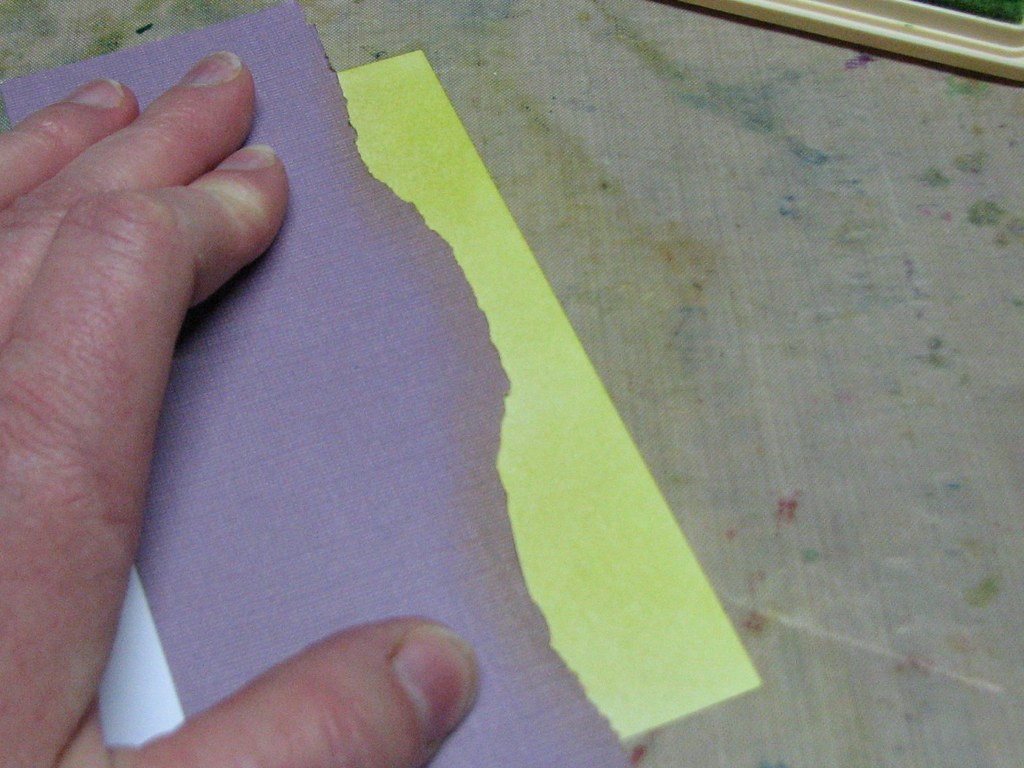
3. Move the torn paper in 1/4" - 1/2".
4. Pick up the second shade of ink and ink the entire exposed area as you did previously. (Adirondack Dye Ink - Citrus)
5. Again, move the torn piece of paper 1/4" - 1/2" towards the edge of the paper. This will be your last color application.
6. Pick up the darkest color of ink using your Ink Blending Tool & Foam and apply it to the last of the exposed cardstock. (Adirondack Dye Ink - Lettuce)
This is what your finished border will look like.....below is a finished example using this method.
 Thank You...
Supplies: Adirondack Dye Ink - Willow, Citrus, Lettuce, Ink Blending Tool & Foam - Ranger; Flower Stamp - Autumn Leaves; Sentiment - Fiskars; Cardstock - Bazzill


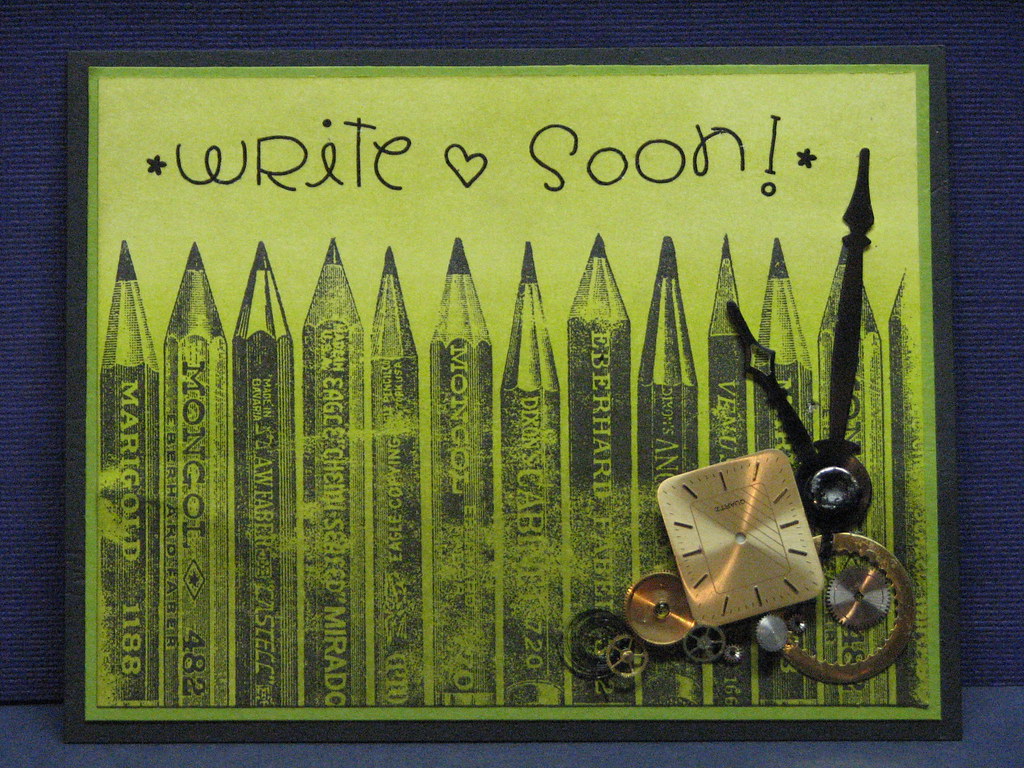
Write Soon!

Gradient Background
The supplies used in the first example will also be used in this technique. It is done in the same manner, you will apply inks beginning with your lightest on one end of your cardstock working into the middle value and finishing with the darkest color of ink on the other end. You can see how it gradually gets darker at the bottom. Below is a card example using this type of background.
Write Soon!
Supplies - Adirondack Dye Ink - Willow, Citrus, Lettuce, Ink Blending Tool & Foam - Ranger; Pencils Stamp - Lost Coast Designs; Rub-on Letters - Doodle Bug Designs; Cardstock - Bazzill; Clock Parts - Unknown.

Monday I have a couple more techniques using this same basic method of blending with monochromatic color schemes and the Ink Blending Tool. I promise you will be amazed at how different the looks are from those shown today!
So till then friends, have an inky day!!
You have convinced me that I must get this blending tool ... however, I can't find it anywhere locally. Where's the best place to pick it up online?
ReplyDeleteThat is such a COOL techique!!! Thanks for sharing that one. I'll now have to buy some new ink pads. Just think, a nice excuse to buy more supplies!! :D
ReplyDeleteI'm glad you're interested in the IBT! It is honestly my favorite tool I have!
ReplyDeleteHere are a couple links where you can find the Ink Blending Tool :)
In the USA
http://www.schmoozewithsuze.com/product/product.php?pID=070801082919
http://www.blockheadstamps.com/tools.html
In the UK -
http://www.thestampattic.co.uk/tim_holtz_alcohol_ink.htm
Love this technique...and it is so versatile. I can see using it for all kinds of background. In addition, I'm going to be trying some landscape stamping and this is perfect for that.
ReplyDeleteOoooooh - very cool, Roni. I'm off to try this technique myself now. Thanks (as always) for the bestest, most useful and definitely more better techniques and ideas. This is my favorite blog!
ReplyDelete~ phinny
(who has Spring Fever today and is feeling silly - lol)
My friend "Cabbie" refer me this link and thank you so much for the techniques and inspiring ideas using the Adirondak ink.
ReplyDeleteI am very inspired to do one of your Gradient Border Bleding.
I have my blending tool applicator which is for alcohol ink is that also the same blending tool for ink blending?
I guess I have to buy also Adirondak ink to be able to make a beautiful card just like yours.
Elizabeth
http://elizabethtangochuico.blogspot.com
Thanks,another fab technique and lovely cards x
ReplyDeleteAnother great technique, thank you so much. I love your card you made with this one
ReplyDeleteThank you ~
ReplyDeleteElizabeth, yes you can use the Ink Blending Foams on your Alcohol Ink Tool! The IBFoam has velco type loop on the back and will stick to the hook on the Alcohol Ink tool perfectly! Actually in some of the photos you will notice that I am using an AI Tool at times. I just grab whatever is closest at the moment.
Thank you so much Roni.
ReplyDeleteBecause of your tutorials I could be able to use my stash.
This comment has been removed by a blog administrator.
ReplyDelete