
Here are the two images side by side. As you will notice the original is a bit faded where I sprayed the Transfer Ink. This is of course because some of that ink transferred onto the ATC. It is still in good condition though and the fading adds a bit of character I think. So, it's up to you if you'd like to re-use it...I think it leaves the original in good enough condition to make a cool lo or card.

 Image Transfer Ink & Stamped Images....
Now, I never sugar coat anything so these are exactly what happened when I tried this technique. I must say I'm not nearly impressed with this technique as I am the photo transfer but I supposed these images do have their place somewhere.
I found this type of transfer a bit more difficult. Now, that's not necessarily the Transfer Ink but it's hard to gauge exactly how much Transfer Ink to spray onto the stamped image to get a good finished product. You'll see what I mean below.
Supplies:
Transfer Ink - Stewart Superior
Dye Ink - Ranger
Stamps
Cardstock
Copy Paper (to stamp on)
Bone Folder
Instructions:
Basically these are the same for the Photo Transfer Technique. You will stamp the image onto the copy paper, place the stamped image face down on your cardstock, spritz, and burnish with the bone folder.
The first transfer worked pretty well..I like the image quality and it didn't seem to smear the image too bad.

This is a stamped image vs. the Ink Transfer image.
(I tried to soften the original by going over it with a watercolor brush to see if I could achieve a similar look. Worked o.k. I guess.)
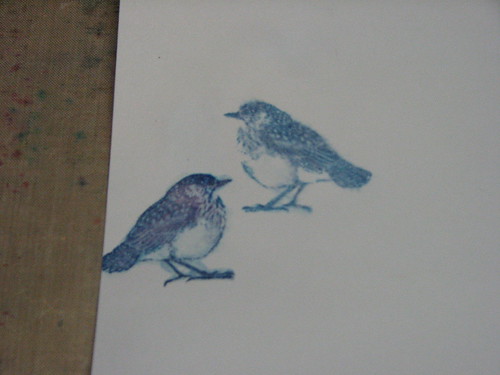
Here are the rest of the results....I'm up in the air about them. The woman's face got a bit smeared. Both the bird and woman are about the same size so I used two squirts of the Transfer Ink thinking it would be enough. Well, it ended up to be too much for this particular image.
Now, I thought since it was too much for that image I'd try one squirt for the owl...not enough! I tried it again and gave it one more squirt and that ended up being too much. Grrrr!
So, my results.... too much Transfer Ink and you get a smeared image (woman) and not enough Transfer Ink and you only get part of the image (owl). Sooooo, I guess if you're desperate for a reversed image I say go for it but otherwise I don't think I'd mess with it... I don't have alot of patients when it comes to doing something 3-4 times to get a good result. I want something to work well and work the first (or second) time.
Not sure if the bird was just beginners luck or what.
There you have it...Transfer Ink & Stamped Images.


I didn't make any examples with these images because I just didn't care for the results. If you give it a try and get them to work I'd love to see your results and hear how many squirts you used. For me, I'm sticking with the Photo Transfers...far easier and no mistakes - LOL!!
I'll have to try and find that transfer spray. Such a neat look.
ReplyDeletethat is so cool.
ReplyDeleteThanks for the info. It was very helpful.
ReplyDelete